Today I will show you how to create a website, but instead of using something like Wordpress we will be writing the content in Markdown. Markdown is nice because you can jot down your ideas quickly using simple syntax and even work offline. Using this markup language has been an super easy adjustment for me as I already write all my notes and code documentation using it.
We will also be exploring some new technologies and techniques to get us started quickly and automatically deploy to the cloud. The best part is we will do this all for free, so it makes for a great side project or sandbox environment.
Let’s get started..
Table of Contents
Hugo
 Hugo is a static site generator written in go. Content is written in markdown locally, rendered for viewing using a built-in webserver, and builds static .html files. This building process can be a Continuous Integration (CI)/Continuous Deployment (CD) from github to aws s3 – More about that in a bit!
Why Static Sites
Security
Security is, in my opinion, the top selling point. Unlike the world’s number one CMS, Wordpress, there are no admin portals to secure, no databases to patch/maintain/put-passwords-in-config-files, no outdated plugins, and no PHP vulnerabilities.
You can’t hack an html file, and when you host your sites on a major CDN your site is also more likely to survive DDoS attacks.
Scale, Speed, and Simplicity
- By uploading static files to a Content Delivery Network (CDN) such as AWS Cloudfront you distribute your site across the country (or even the world!).
- There is also a highly likely chance that your content is cached by your frequent visitors. New visitors will most likely be caching things like jquery from other sites already using CDNs.
- As I mentioned before, there are no databases or interpreted languages that would make your site slow to load.
Install
MacOS
brew install hugo
Windows
choco install hugo -confirm
Linux (snap)
snap install hugo
Linux (devian/ubuntu)
sudo apt-get install hugo
Linux (RHEL-based)
sudo dnf install hugo
Quick Start
hugo is the executable. Give hugo version and hugo help a try.
New Site
hugo new site martinitc
This creates a new site called martinitc. Lets go checkout the layout (cd martinitc && ls)
archetypes config.toml content data layouts static themes
- Themes: Where themes are installed. Find some here: https://themes.gohugo.io/
- Content: This is where your markdown files will go. If you create blog posts they will end up in a subfolder called /posts/
- config.toml: This is the site’s config file. Play around with it. The settings can be simple or complex and may change depending on the theme you select.
We will focus more on this below, but for now let’s create a fresh local Git repo. We will also download a simple theme for our site to use as a git “submodule”
git init
git submodule add https://github.com/budparr/gohugo-theme-ananke.git themes/ananke
I’ll adjust my config.toml to look like this:
baseURL = "https://martinitc.tk/"
languageCode = "en-us"
title = "My New Hugo Site for martinitc.tk!"
theme = "ananke"
New Post
Create a new blog post by using hugo new posts. Example:
hugo new posts/hello-world.md
martinitc/content/posts/hello-world.md created
Let’s edit the new markdown file:
---
title: "Hello World"
date: 2019-01-30T16:42:38-05:00
draft: false
---
# Hello World
Welcome to martinitc.tk!  You should go visit https://www.martinitc.com
View and Build the site
hugo server -D
This starts a local webserver which you can access at http://localhost:1313/
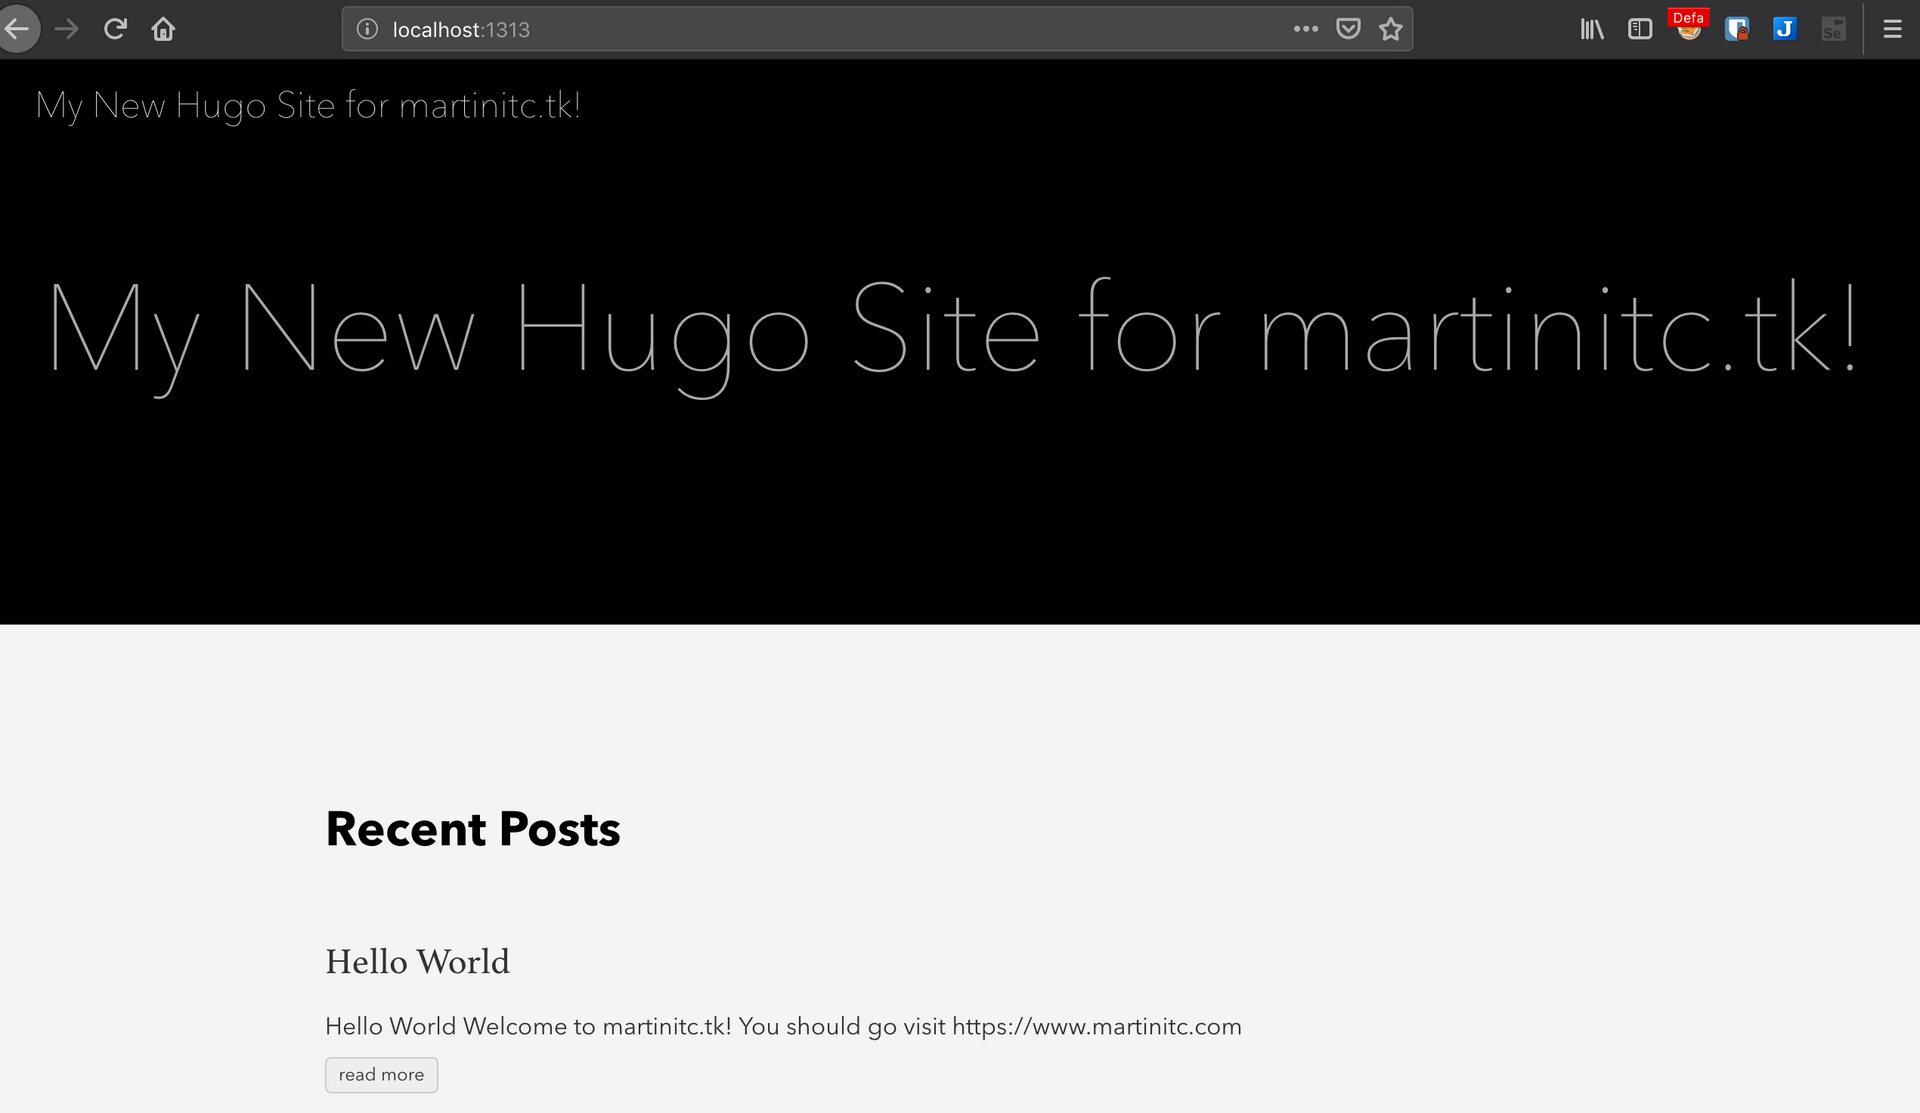
At this point you can add more content, get different themes, tweak your config file, etc..
When you’re ready to generate static content just run hugo in your project folder and it will dump all static files to public/ Keep reading below to see how we can use Continuous Deployment to automatically build and upload these static files to the cloud.
Git
Git is a free and open source version control system. You can have local repos or sync to other remote repos like github.
Above we had already run git init and git submodule add. These commands create a fresh blank repository and then add an existing/separate git repository to the theme folder.
Github.com has always given free accounts with unlimited public repos, and recently (after Microsoft bought them) they have started to allow free unlimited private repos. I personally like to keep my website in a private repo because I might have drafts of posts that I might not be ready to be viewed publically.
Follow these steps to sync your current website to github:
- Create a github account
- Create a new private repo
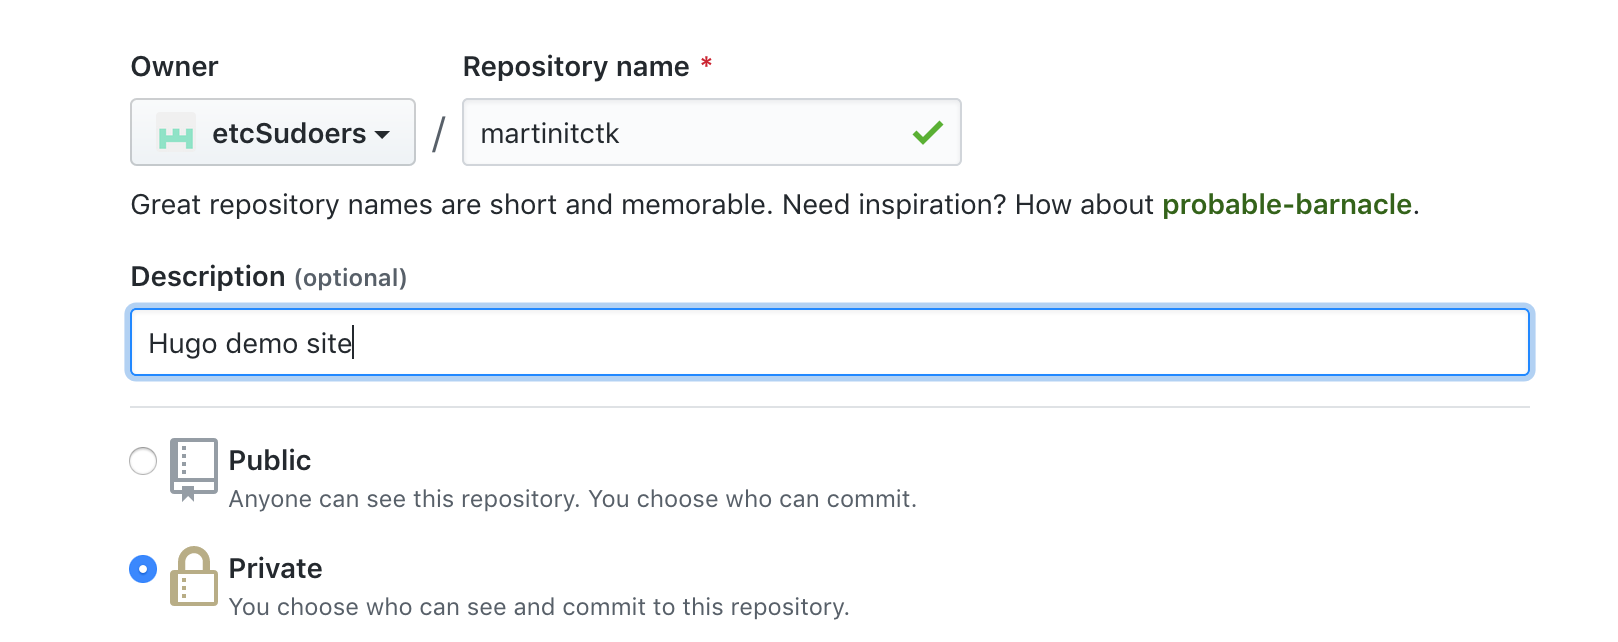
- In your project folder add the new remote repo
git remote add origin https://github.com/etcSudoers/martinitctk.git - Add all the new files to your git repo (locally),
git add .This command recursively adds all new files and folders. - Commit locally.
git commit -m "first commit" - Push the commit to the remote repo
git push -u origin master
Done! You may want to add a .gitignore file to your project to prevent files and folders like public/ from being tracked by the version control. It is also a good idea to create a markdown file called README.md to provide a nice descriptive document to describe your project.
netlify
 At the most simplistic description, netlify is a service that watches over your github repo for changes and automatically rebuilds and redeploys your site.
I love this service. It is well designed and includes features like:
- Free SSL (Using letsencrypt) and which auto renew
- AWS Lambda functions
- Forms
- Identity management
New site from Git
- Create a new site on netlify.
- Select “New site from Git”
- Select GitHub as your provider and authorize netlify to have access
- Select your repository, and adjust your settings such as branch, etc, as needed. Deploy Site.
- Your Site will be deployed to a netlify subdomain. Continue onto the next section and we will come back to setting up the Custom Domain.
Free Domain and DNS

Head on over to dok.tk and register yourself a free domain. The government of Tokelau, a small country in the South Pacific, and private company Teletok and BV Dot TK provide free domains – They also provide premium name domains for a fee.
Dot TK’s mission statement:
The mission of the Dot TK Registry is to create a network of individuals, and companies that have an existing Internet presence and have these users register a Dot TK domain name to provide a free, short, easy and secure alternative name for their Internet identity; where the proceeds of the Dot TK Registry goes partly towards development projects on the Islands of Tokelau.
For more information visit About Dot TK

Other known free domains:
- .ML
- .GA
- .CF
- .GQ
Register your domain
- Search and find the domain you want to use. Go through the “checkout” process
- Go back to your netlify site setting and select “Custom Domain”. Select the alert link “Check DNS Configuration” for the primary domain
- Select “Use Netlify DNS”, go to the last step
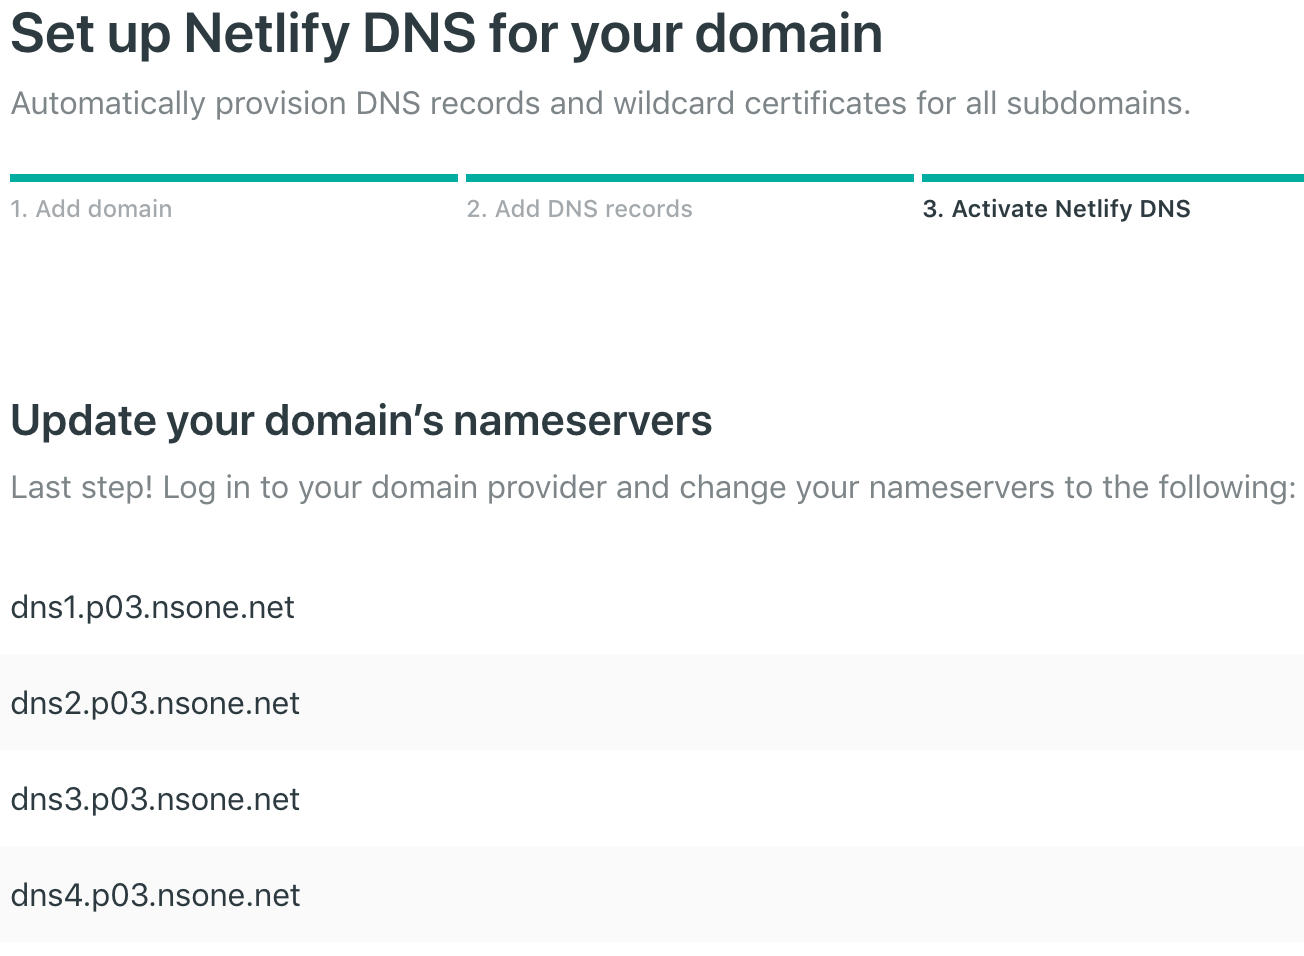
- Go back to the checkout process. Select “Use DNS” -> “Use your own DNS”
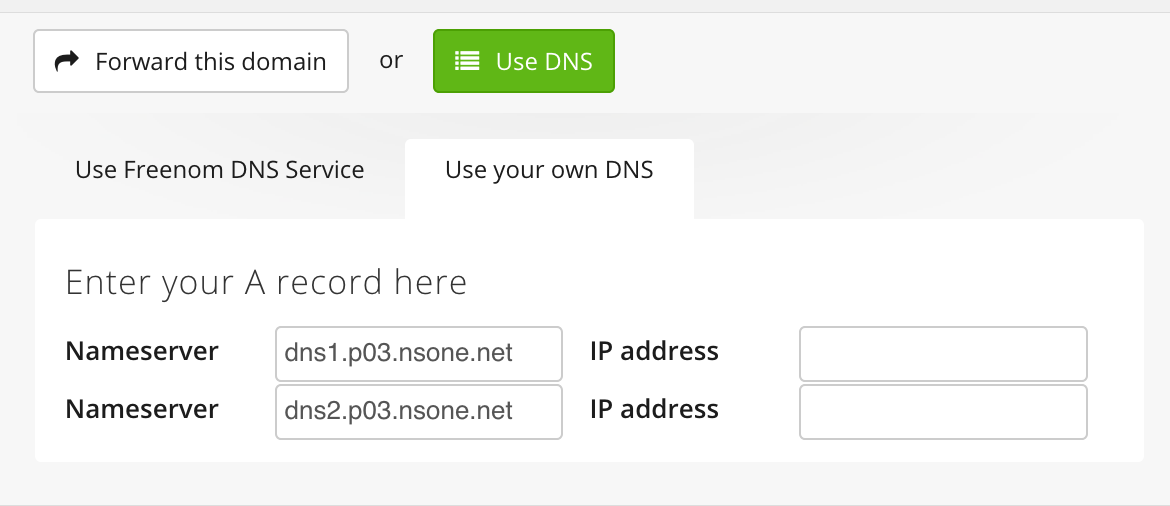
- Checkout/verify link/Complete order for the free domain
- Go back to netlify. Verify that DNS is working. Auto-generation of SSL certs may take a bit while DNS propagates.
Done
Enjoy the free website, and I hope you had fun trying out some new techniques!
Side note for existing Ghost blog users: I found this useful for converting my existing Ghost content over to hugo.
